Photos might be the most important app on the Mac. After all, it is used to manage your precious, invaluable photos. So when a new version is in the works, you probably want to be aware of any new features, and there are a few coming to Photos in macOS 11 Big Sur.
Let’s take a look at the new features in Photos 6.
Photo editing tools
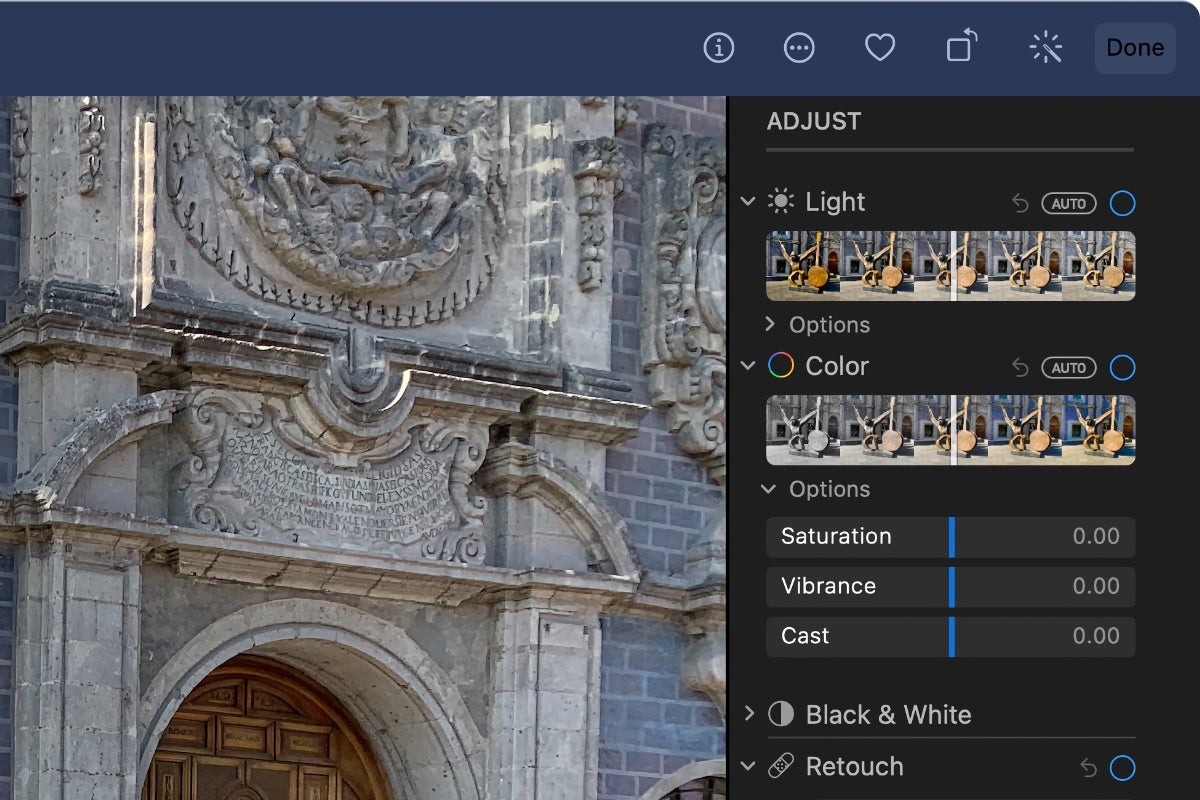
When tweaking a photo’s colors, Photos now offers a Vibrance adjustment. It’s found under Color in the Adjust tools. Apple has also adjusted the Retouch tool with “advanced machine learning” so it does a better job when you use it to remove blemishes.
There’s a new Vibrance adjustment under Color.
Video editing tools
In previous versions of Photos, you could import videos, but all you could do is watch them. Now, Apple provides editing tools. They’re the same tools you use when editing photos—that also includes the ability to apply filters, crop, and trim a video’s length.
The new editing tools for videos are great for doing basic edits. You need to use iMovie or another video editor if you want to do more production, like string different clips together, add titles, etc.
Captions
When you are looking at your photos and videos, Photos now shows the file name under each item. You can edit this label to if you want. Just click on the name, and it will highlight, then you can type in what you want. You can also get info on an item (right-click it and select Get Info, or select the item and them clock on the Info button at the top of the app, or selec an item and press Command-I), and then in the window that appear, add a caption by typing it in the Add a Caption section.
Captions give your photos more context.
Memories
Apple says that the Memories section has been improved to include a “more relevant selection of photos and videos.” There’s also more music tracks, and Memory movies are now enhanced with video stabilization.
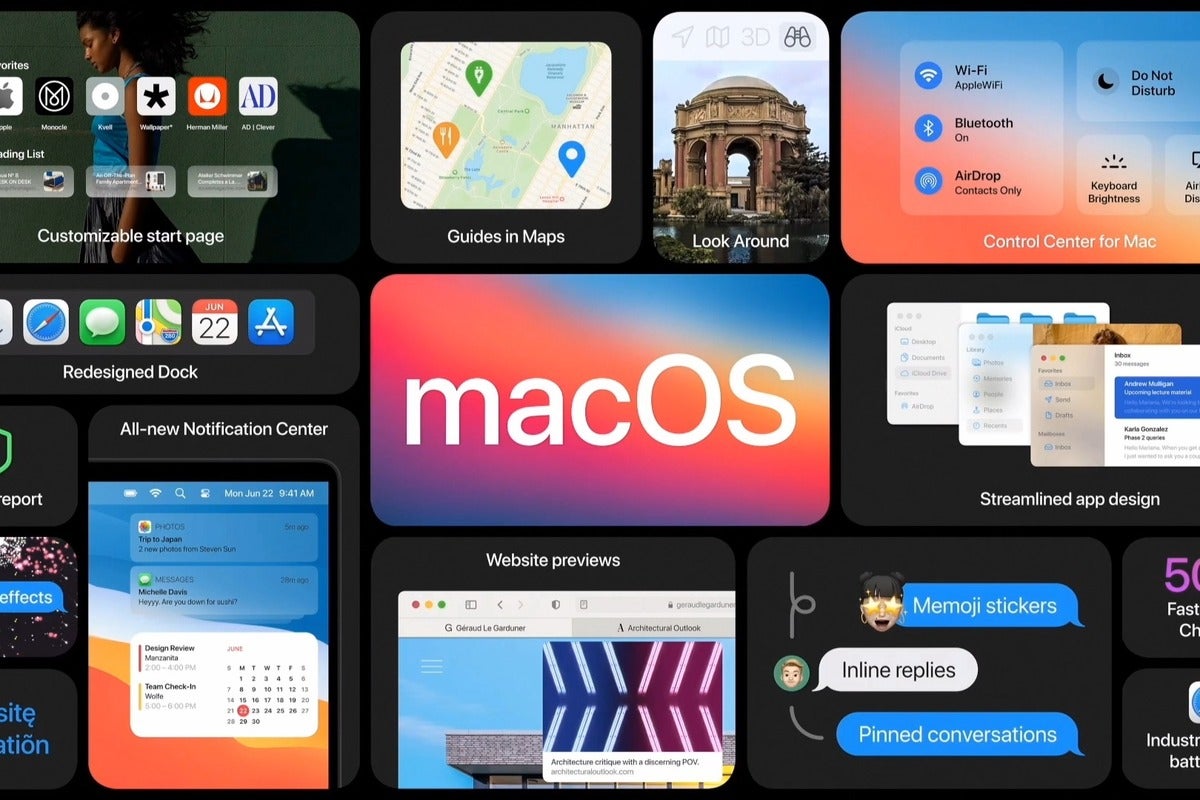
With macOS 11 Big Sur, Apple takes the opportunity to refresh the Mac’s user interface. The changes aren’t dramatic—don’t worry, you’ll be able to use your Mac like usual. The changes give the Mac a more modern look, and also have led to speculation that Apple is getting ready for the next phase of user input, like maybe a Mac touchscreen.
If you are wondering what Big Sur looks like before installing it, we have a peek right here. You can prepare yourself before you dive in.
More space
Once you start up your Mac and log in, the Finder looks pretty much the same. The changes are subtle. For example, the menu bar icons are spread out, with each icon having a little more space. It makes it easier to spot the icon you want.
The menu bar icons in macOS Big Sur (top) and macOS Catalina (bottom).
Click on a menu, and you’ll notice that the listed items have more space.
Menus in macOS Big Sur (left) and macOS Catalina (right).
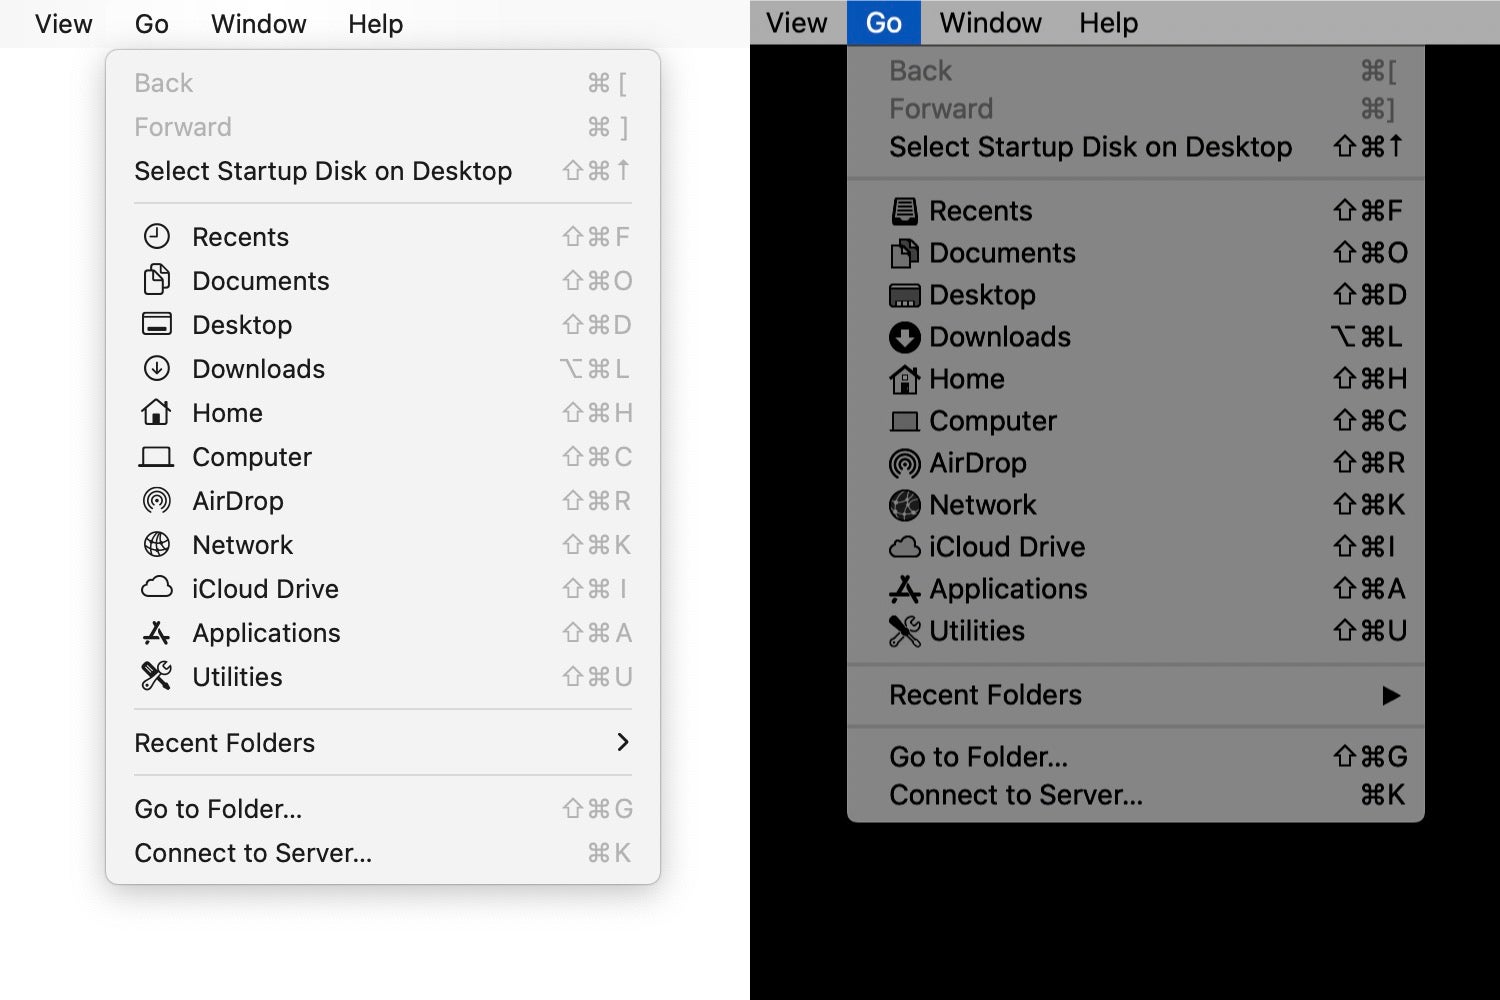
Menu bar items
Apple’s menu bar items have also been redesigned. For example, The Wi-Fi menu bar has been reorganized. Now, your preferred networks for an area are listed, and the rest of the available area networks are in an Other Networks section.
The Wi-Fi menu bar item in macOS Big Sur (left) and macOS Catalina (right).
If you have third-party items in the menu bar, they should look like they did previously. It’ll be up to the developers if they want to redesign their UI.
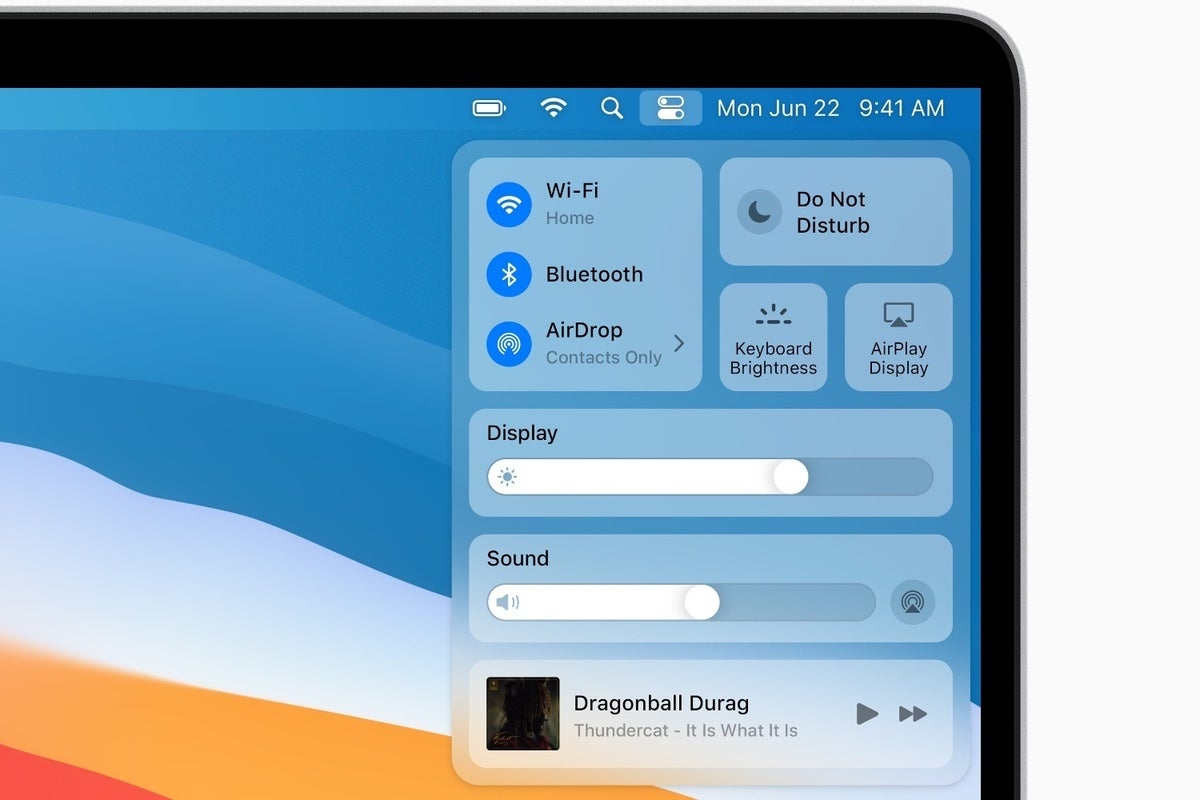
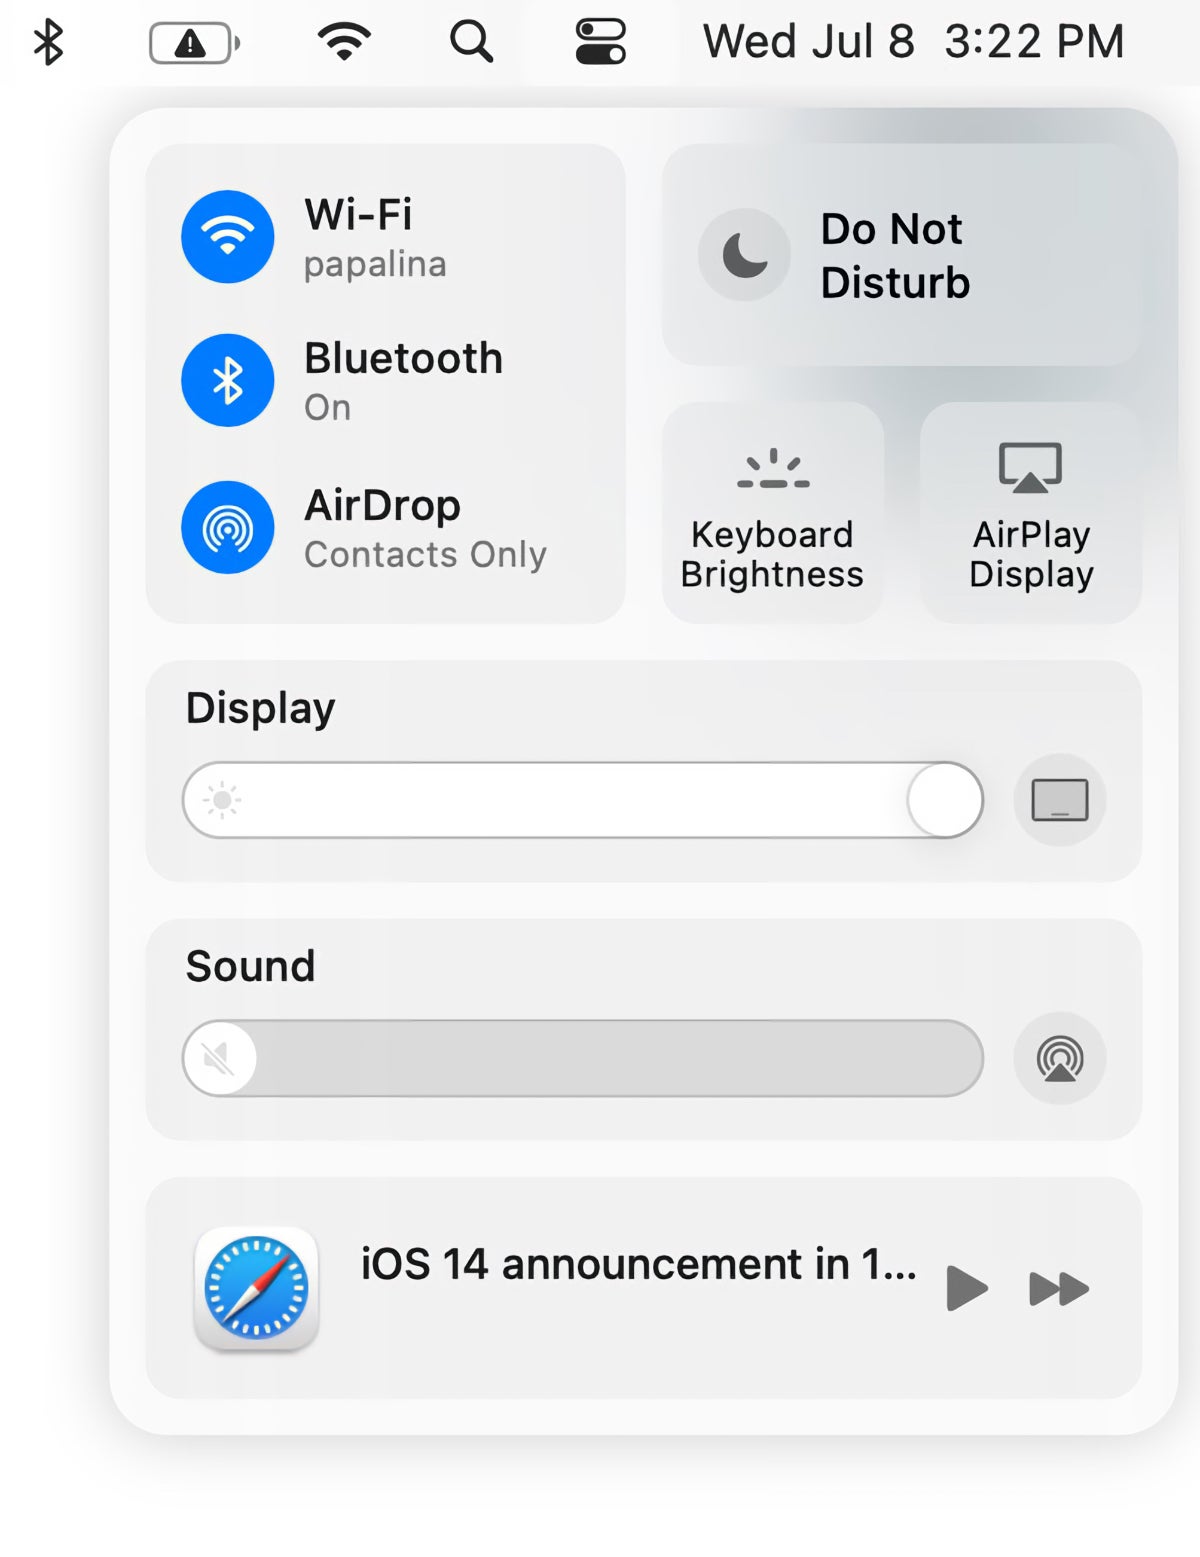
Control Center
Apple has taken the Control Center from iOS and made a Mac version. Its icon appears in the menu bar, and you get quick access to controls such as network, display brightness, and volume. It is customizable, so you can add the controls you want.
If your menu bar is getting crowded, you can use Control Center to take some items off the bar. For example, you can use Control Center for your sound volume, and then remove the volume control menu item. Also, you can click and drag Control Center items and place them in the menu bar for quick access.
Control Center in macOS Big Sur
Notification Center and widgets
When you click on the date in the menu bar, the revamped Notification Center, which combines your notifications and widgets, appears on the screen.
Adding a widget to Notification Center.
To add a widget, click the Edit Widgets button at the bottom. Notification Center will expand to show a listing of available widgets. Some widgets are available in small, medium, and large sizes; click the S, M, or L buttons to preview each widget size. Mouse over the widget itself, and a + button appears on the upper left; click that button to add it to Notification Center. You can then click and drag the widget in the Notification Center to the location you prefer.
New Dock icons
Apple has changed up the look of the Dock, as well. Icons of Apple apps have more of an iOS look, and the Dock has rounded corners. You still have the same options for the position of the Dock, turning hiding and magnification on or off, and to minimize the Dock using either the Genie or Scale effect.
The Dock in macOS Big Sur (top) and macOS Catalina (bottom).
Other changes
You’ll notice other changes with dialog boxes, sidebars, Finder windows, and more within macOS Big Sur. For example, some buttons in windows disappear when you move the cursor away from the area they are located. Most of the changes aren’t major and you’ll be able to navigate your Mac just as easily as before.
Dialog boxes have a fresh new look.
Sounds
Longtime Mac users will remember that the Mac used to “chime” when you powered it up. The chime is back by default in macOS 11 Big Sur. We have a separate article that covers the chime, and we also tell you how you can disable it if you prefer to have a silent boot process.
Also, the system sounds have been updated so that they are “more pleasing to the ear,” according to Apple. They’re new takes on the old version, so they’ll be familiar.
Longtime Mac users will remember that the Mac used to “chime” when you powered it up. Apple removed the chime in 2016, but with macOS 10.15 Catalina, users could reinstate the chime through a command in the Terminal.
The chime is back by default in macOS 11 Big Sur. In the short video clip below, you can hear what the chime sounds like on my (beat-up) 2014 MacBook Pro running the Big Sur beta.
If you mute the Mac’s audio before you shut down, the chime will not play the next time you boot the computer. If you want to turn off the chime all together, you can do so in the Terminal. Here are the steps.
Launch the Terminal app. It is located in Applications > Utilities.
At the prompt, enter the following: sudo nvram StartupMute=%01 and then press Return.
You may be asked for your user password. Type it in and then press Return.
You’re done.
If you later want to turn the chime on, use the same instructions above in the Terminal, but at the second step at the prompt type sudonvram StartupMute=%00 instead.
Install and run Big Sur now by joining Apple’s Public Beta program.
The next version of the Mac operating system, macOS 11 Big Sur, will be officially released this fall. But you can install and run Big Sur now by joining Apple’s Public Beta program.
Interested? Here’s what you need to know about the Public Beta.
Sign up for the program and install the macOS Big Sur Public Beta
Before you can install the new operating system, you must be enrolled in the Public Beta program. You can do this through Apple’s Public Beta program website. In the Get Started section of the website, click on the “enroll your Mac” link.
This should take you to the “Enroll you devices” webpage. Follow the instructions. In step 2, you will download the “macOS Public Beta Access Utility” which will enroll your Mac into the program. Then the utility will launch Software Update to download and install the Big Sur beta.
The installation takes a while. It can take about 40 minutes or longer, depending on your internet connection speed.
What is the macOS Big Sur Public Beta?
The current version of the Mac operating system is macOS 10.15 Catalina. The next version is macOS 11 Big Sur. Apple makes a public beta version of Big Sur available for people to try out, test against their favorite software, and report bugs to the company.
Since this is beta software, there’s a good chance it could cause problems on your Mac. You may encounter frequent freezes and crashes, or your apps may not work. Don’t count on it being stable enough to use all the time.
Should you install the macOS Big Sur Public Beta?
You should not install the beta on a production Mac or any other Mac you depend on and need to keep running. If you’re worried that a beta flaw will prevent you from using your Mac, don’t install it. Install it on a Mac that you consider a secondary computer.
If you do decide to try the beta, you can provide Apple with valuable feedback and get a look at the new features.
What should you do before installing it?
Back up your Mac. You can use Time Machine or whatever backup setup you already have. You need a backup you can revert to in case you need to stop using the beta and need to restore your system.
The macOS Public Beta Access Utility checks to see if you’ve made a Time Machine backup of your Mac. You can proceed even if don’t have one.
Which Macs are compatible with macOS Big Sur?
MacBook (2015 or later)
MacBook Air (2013 or later)
MacBook Pro (Later 2013 or later)
Mac mini (2014 or later)
iMac (2014 or later)
iMac Pro (2017 or later)
Mac Pro (2013 or later)
How to uninstall the macOS Big Sur beta
If you try out the beta and decide later that you don’t want to use it anymore and want to go back to macOS Catalina, Apple has instructions on How to unenroll from the public beta. You’ll need to use a Time Machine backup to restore your system back to the OS before Big Sur was installed. Apple also has instructions on how to restore your system if you want to reformat your Mac and start over from scratch.
What happens after the final version ships?
You can continue to use the public beta. You’ll get beta versions of Big Sur updates when they become available. If you want to get rid of the beta and install the final version of Big Sur, you can download the macOS Big Sur installer in the App Store when it becomes available in the fall.